Chapter 3: Conflagration
Foreword
Prepare your mind, Commander. This will test your aptitude for observation, deduction and response just as much as it will your piloting. Liquidating pirates efficiently requires observing patterns, making hypotheses, establishing facts, and combining them to produce methods you can use.

Unlike the previous chapters, please note that this one contains some examples and descriptions which are particular to my experience and surroundings:
- Anything which concerns factions, powers or superpowers may be recast or reversed elsewhere in the Galaxy. This can affect which starships appear to be Wanted versus Clean, and which types of starship you encounter.
- I have named various locations as examples, although there is no requirement to visit these specifically, given that you will almost certainly be able to find similar in an area of the Galaxy more local to where you operate. If in any doubt, try referring to my locations until you know what you were seeking elsewhere.
That said, please feel most welcome to visit either way; the Imperial Flight Operations Bureau is always eager to welcome any friendly Commander who wishes to grace our region of the Galaxy.
Shall we begin?
Arena
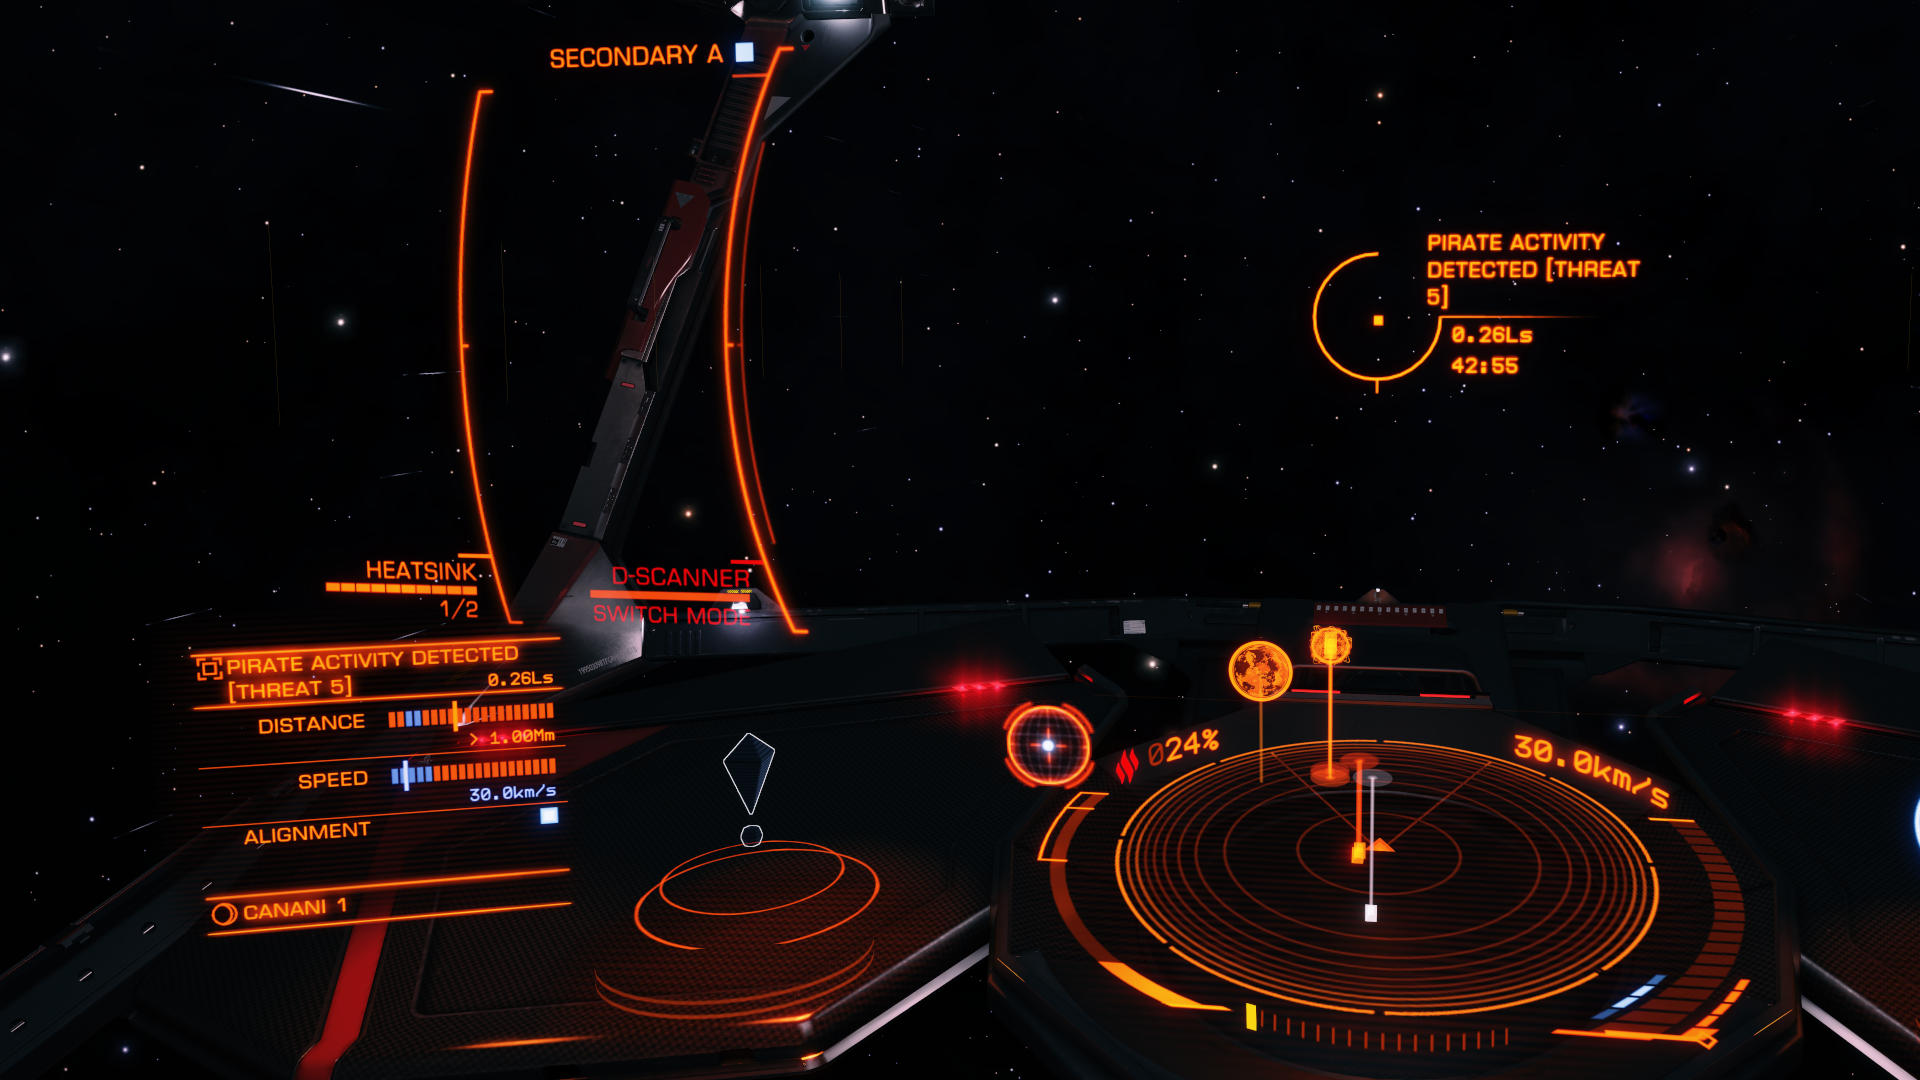
There are a few different methods and locations you can use to catch pirates in the act. As quantified by the Claims page of my Transactions panel, and as best as I have been able to determine, the greatest amount of crime can be crushed at a Hazardous Resource Extraction Site found within many planetary rings. One such site resides within the icy ring orbiting planet 4 of the Calennero system.
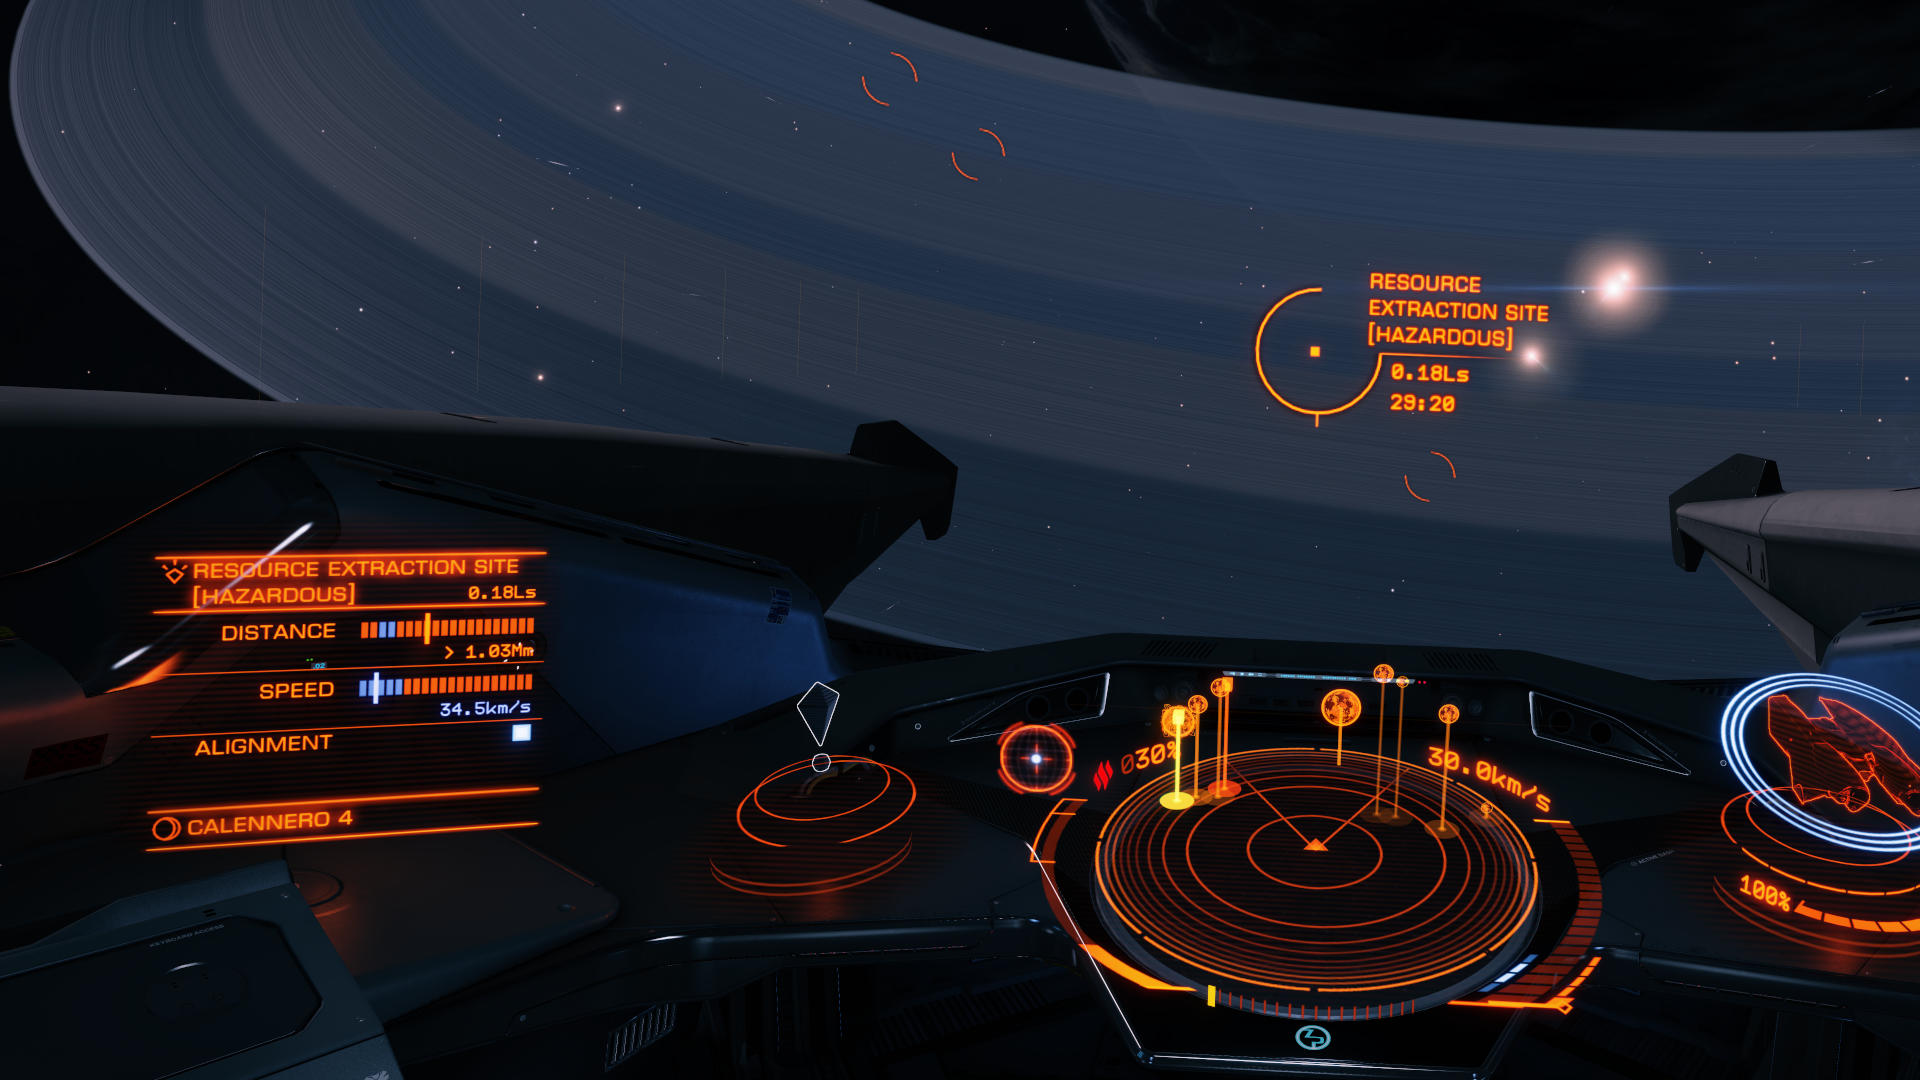
Given that my goal concerns the direct bounty claim total, it is with a little hesitation that I describe my conclusion more fully using a wider comparison with methods which are not optimal, but ultimately I believe in the combined value of justifying my claim, conveying my thought process and cataloguing said methods more generally. Beyond this overview, I will assume that you are at a Hazardous Resource Extraction Site.
In terms of quantity, the slowest approach is to patrol a star system in Supercruise and interdict any Wanted starships you find. This environment presents few targets, and the interdiction routine takes far too much time to be considered a feasible overhead for each bounty claim.
By all means accustom yourself to that process; it is the fastest way to fulfil a military assassination contract for a subject guilty of desertion, and can still be useful for a clean-up mission if such concerns a binary star system where the primary is not the star around which civilisation exists. If reaching a signal source would take more time than the mission is worth then it be may faster to force targets out of Supercruise, or even just encounter them at the Navigation Beacon.
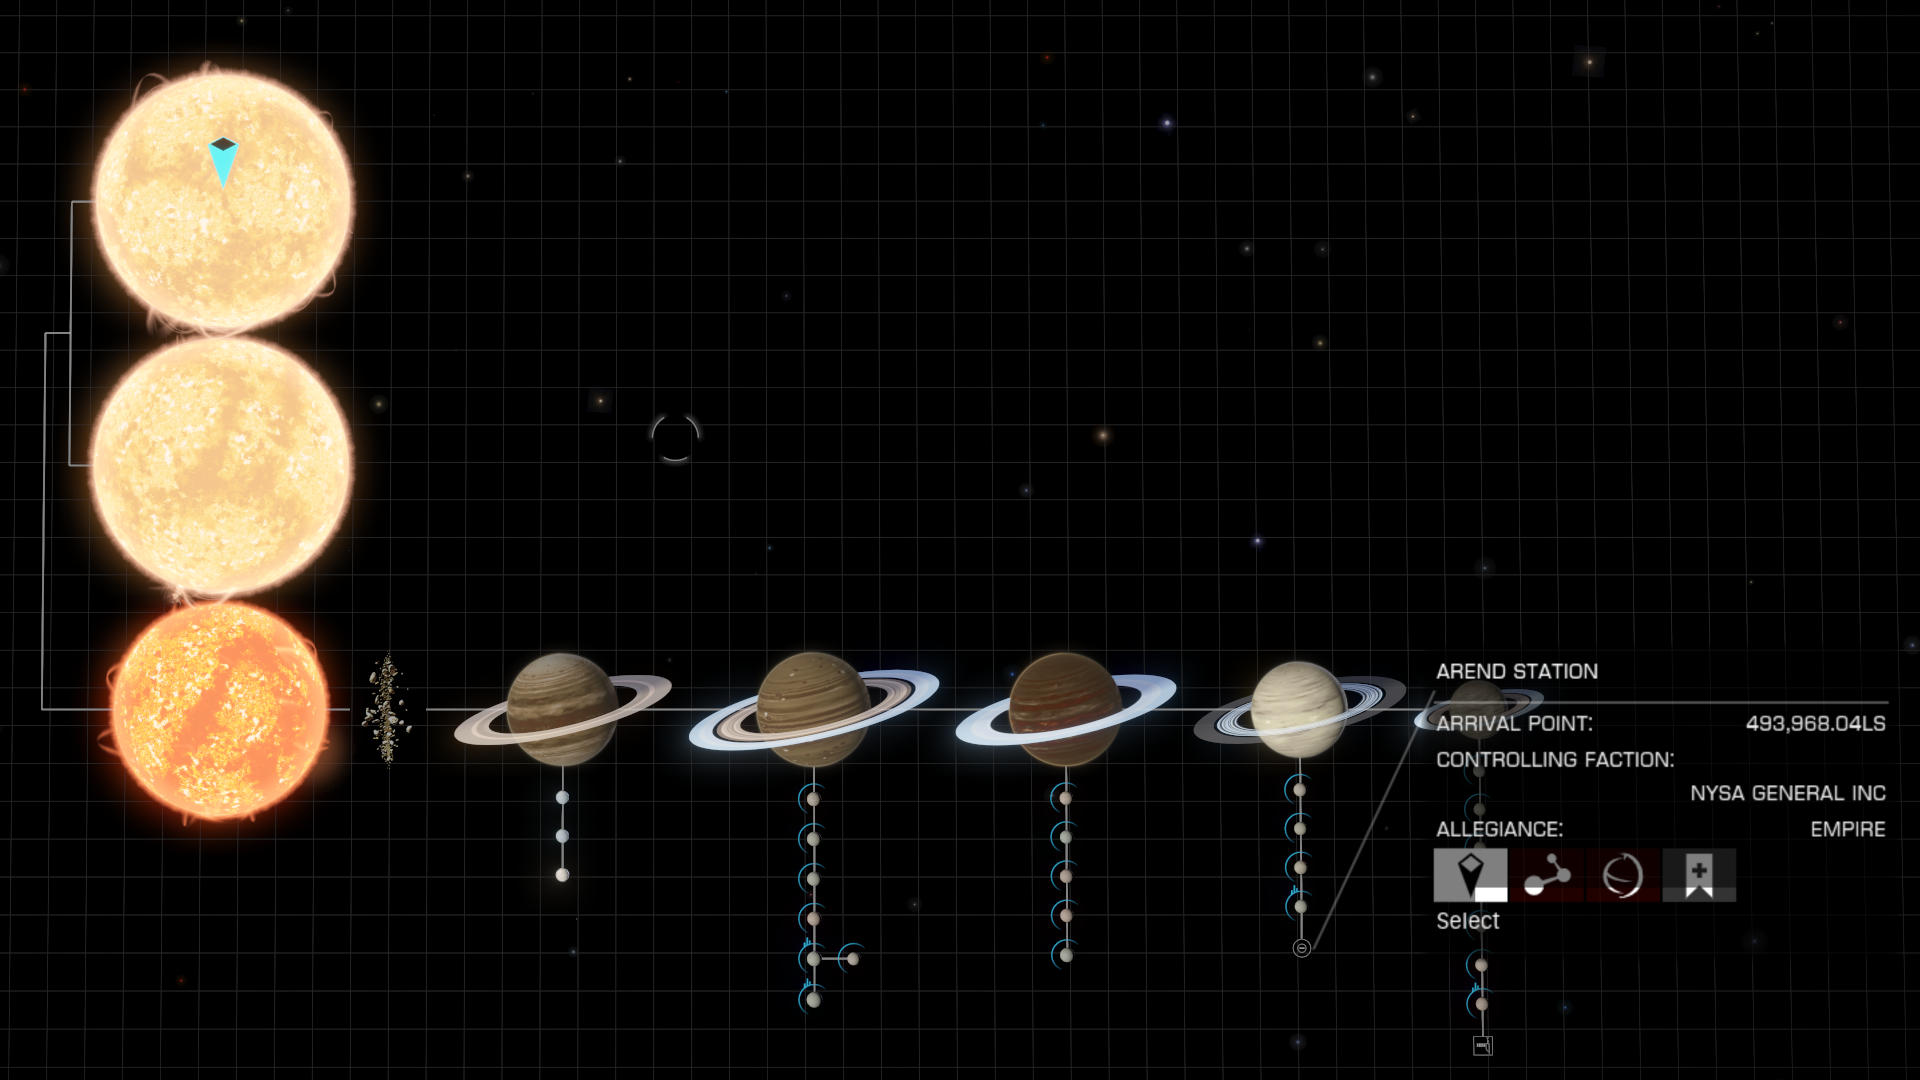
The Nysa system is a perfect example, where the Frame Shift Drive locks onto a heavier star which is almost half a million light-seconds away from anywhere a signal might originate.
Speaking of assassination contracts, using a batch of these to bring multiple fugitives out of hiding at once can score you several high-value scoundrels in swift succession, acknowledging that the Supercruise and Hyperspace overheads are still too high. Worse still, a few of your marks will have fled before you arrive and will require yet more time to follow their trails.
I still appreciate this approach in concept, and I imagine it has the potential to reward Commanders with credits and useful materials aplenty—just not via direct bounty claims. If you wish to try it, I can recommend visiting Fabian City in the HIP 20277 system, where every assassination contract will take you to the Calennero system. Even Fabian City itself orbits a Hazardous Resource Extraction Site directly, and the occasional diversion to Calennero can also be used for processing your foreign bounty claims acquired via Kill Warrant Scanner.
Another way to hunt, almost entirely overlooked, is to engage in mercenary work at a faction installation such as Collective Statistical Scientific low-orbiting planet 8 in the Guathiti system.
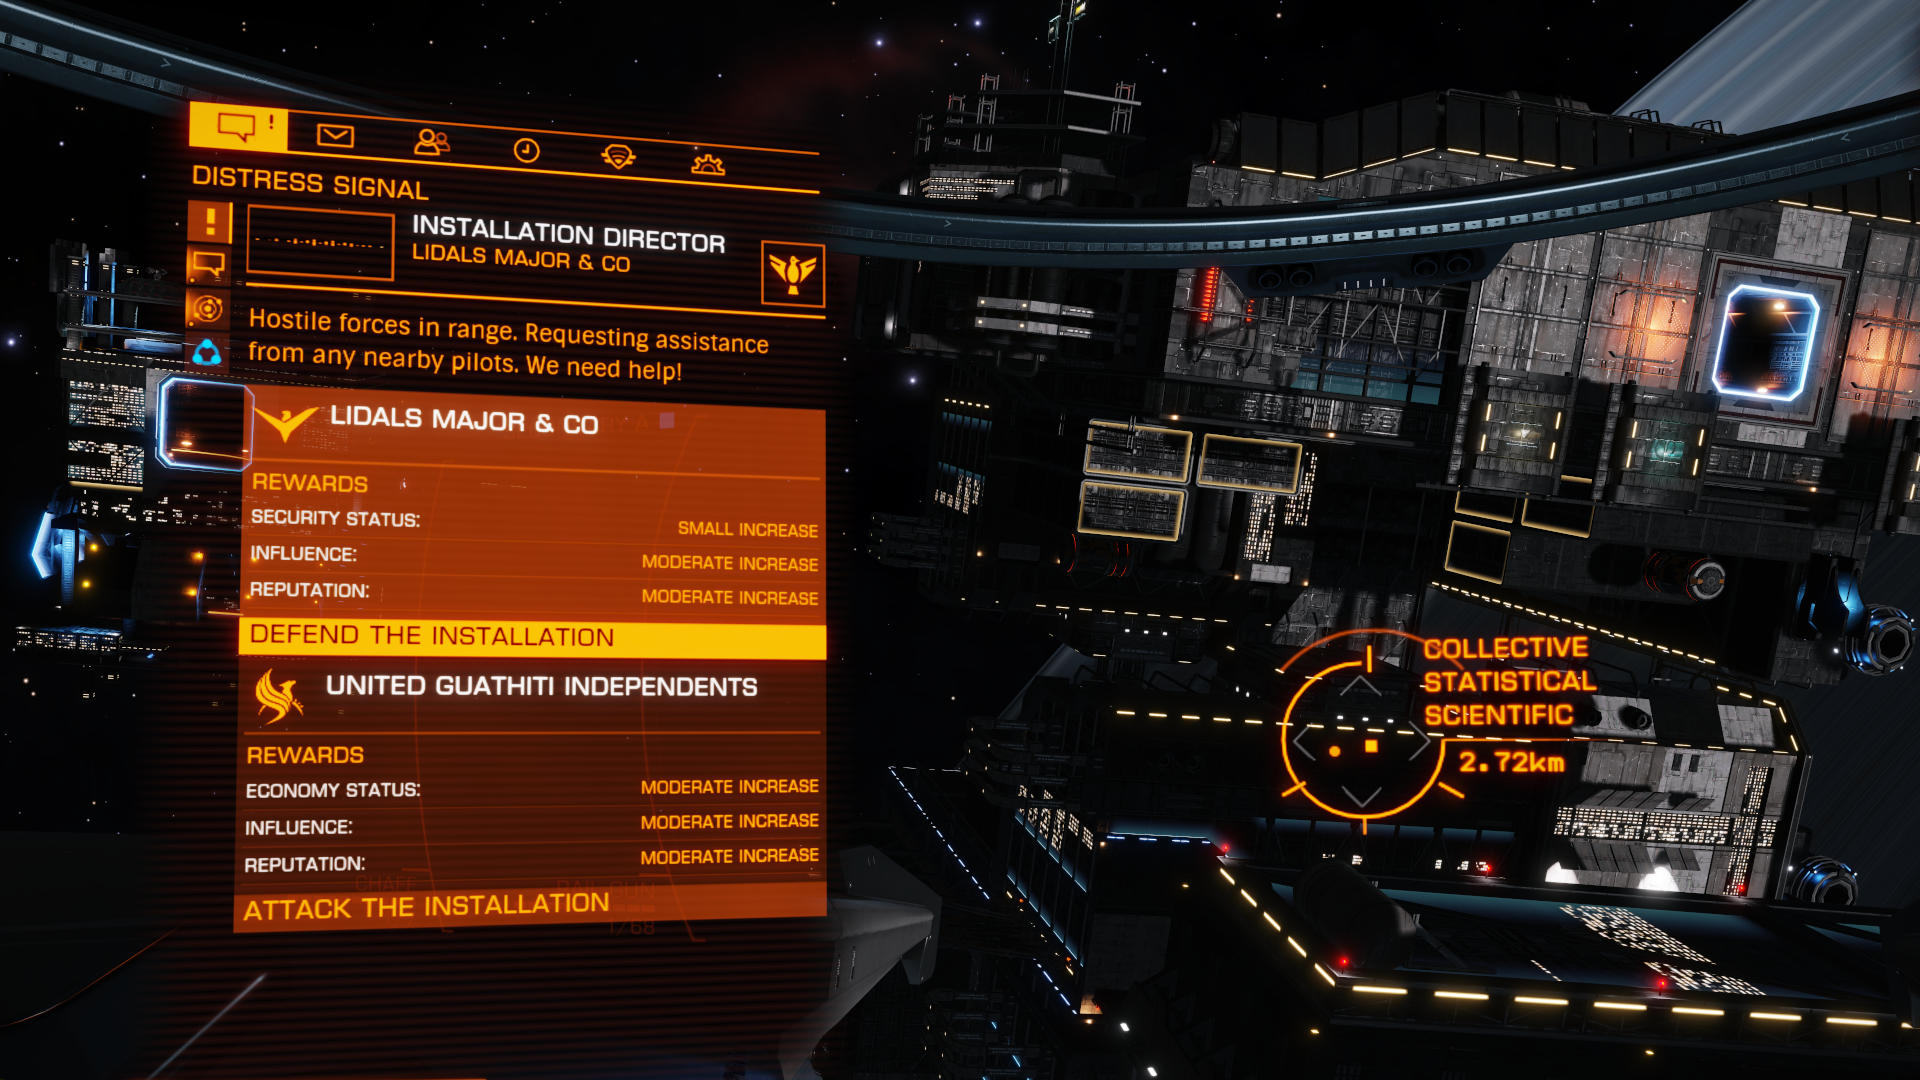
These are attacked periodically, and usually with reinforcements still to come. Defending them well will earn you several bounty claims in relatively quick succession, plus the favour of the faction you are assisting. Be very careful to keep watch of your radar so as not to allow yourself to become separated from your allied faction forces, and do not discharge Fragment Cannons in the direction of the installation structure. Again, this approach would be quite appreciable were it not for the downtime associated with waiting for the enemy to arrive, especially since these facilities have adequate defence already.
Systems beset by civil unrest can attract brazen pirate activity, however I do not recommend attempting to quell it unless you assemble a full Wing first.
This is purely because the starships you will face are very tough to break, requiring perhaps a sixth or more of your ammunition per target, yet do not yield any much more for the trouble. A team of four would bolster the damage and make it equivalent to patrolling a Hazardous Resource Extraction Site solo, but with the advantage of Wanted targets being more plentiful.
I am well aware that Compromised Navigation Beacons are an apparent favourite arena among hunters, however please note that I consider these to be only a vaguely close second to Hazardous Resource Extraction Sites.

We have exactly this problem present right now in the Aerial system, with which many Commanders may well be familiar already due to its rare Eden Apples¹ available for trade. With a bit of luck upon arrival, it is possible to reap a few pirates with bounties slightly higher than the average you will see in the rings. However, in general you will find a lower proportion of Wanted targets, fewer heavies, and that many targets are faster and tougher without necessarily rewarding your extra effort.
1. Properly cored so that there is no risk of consuming its neurotoxic seeds, an Eden Apple is one of the most blissfully delicious desserts one can savour, and if your standard of luxuriation is to drink away enough credits for a small starship then the Eden cider served at the lounge bar in Andrade Legacy will not disappoint. For what I submit as being the single most excessive indulgence in the Galaxy, few visitors know that it is possible to obtain a staggeringly expensive variant of said cider which contains a trace amount of the Eden neurotoxin at just under one part per million, the consumption of which will effect an escalating experience of relaxation, sedation and euphoria. Locally, this rare beverage is known simply as poison, and its obscene scarcity is derived from the fact that the only way to produce it without polluting the entire planet of Shangjun to the point of inhabitability is to use one whole original Eden Apple—unevolved and unmodified—as a contaminant in a batch containing over a million modern apples. These originals are grown only a few at a time within a closed artificial ecosystem which is controlled tightly, where every seed is accounted individually and requires its own file of legal documentation.
Prey
Having observed several Commanders guard the rings, I have noticed that the task of locating and targeting the bandit filth is a major source of inefficiency. As such, the first thing I would like you to do is disable the Cycle Next Target function of your starship. If you have been relying on this function enough that you found it useful to invoke Cycle Previous Ship to correct for cycle overshoot, disable that also.
The Contacts panel is far superior; this will be our primary targeting means, along with the Select Target Ahead function for the occasional visual acquisition.
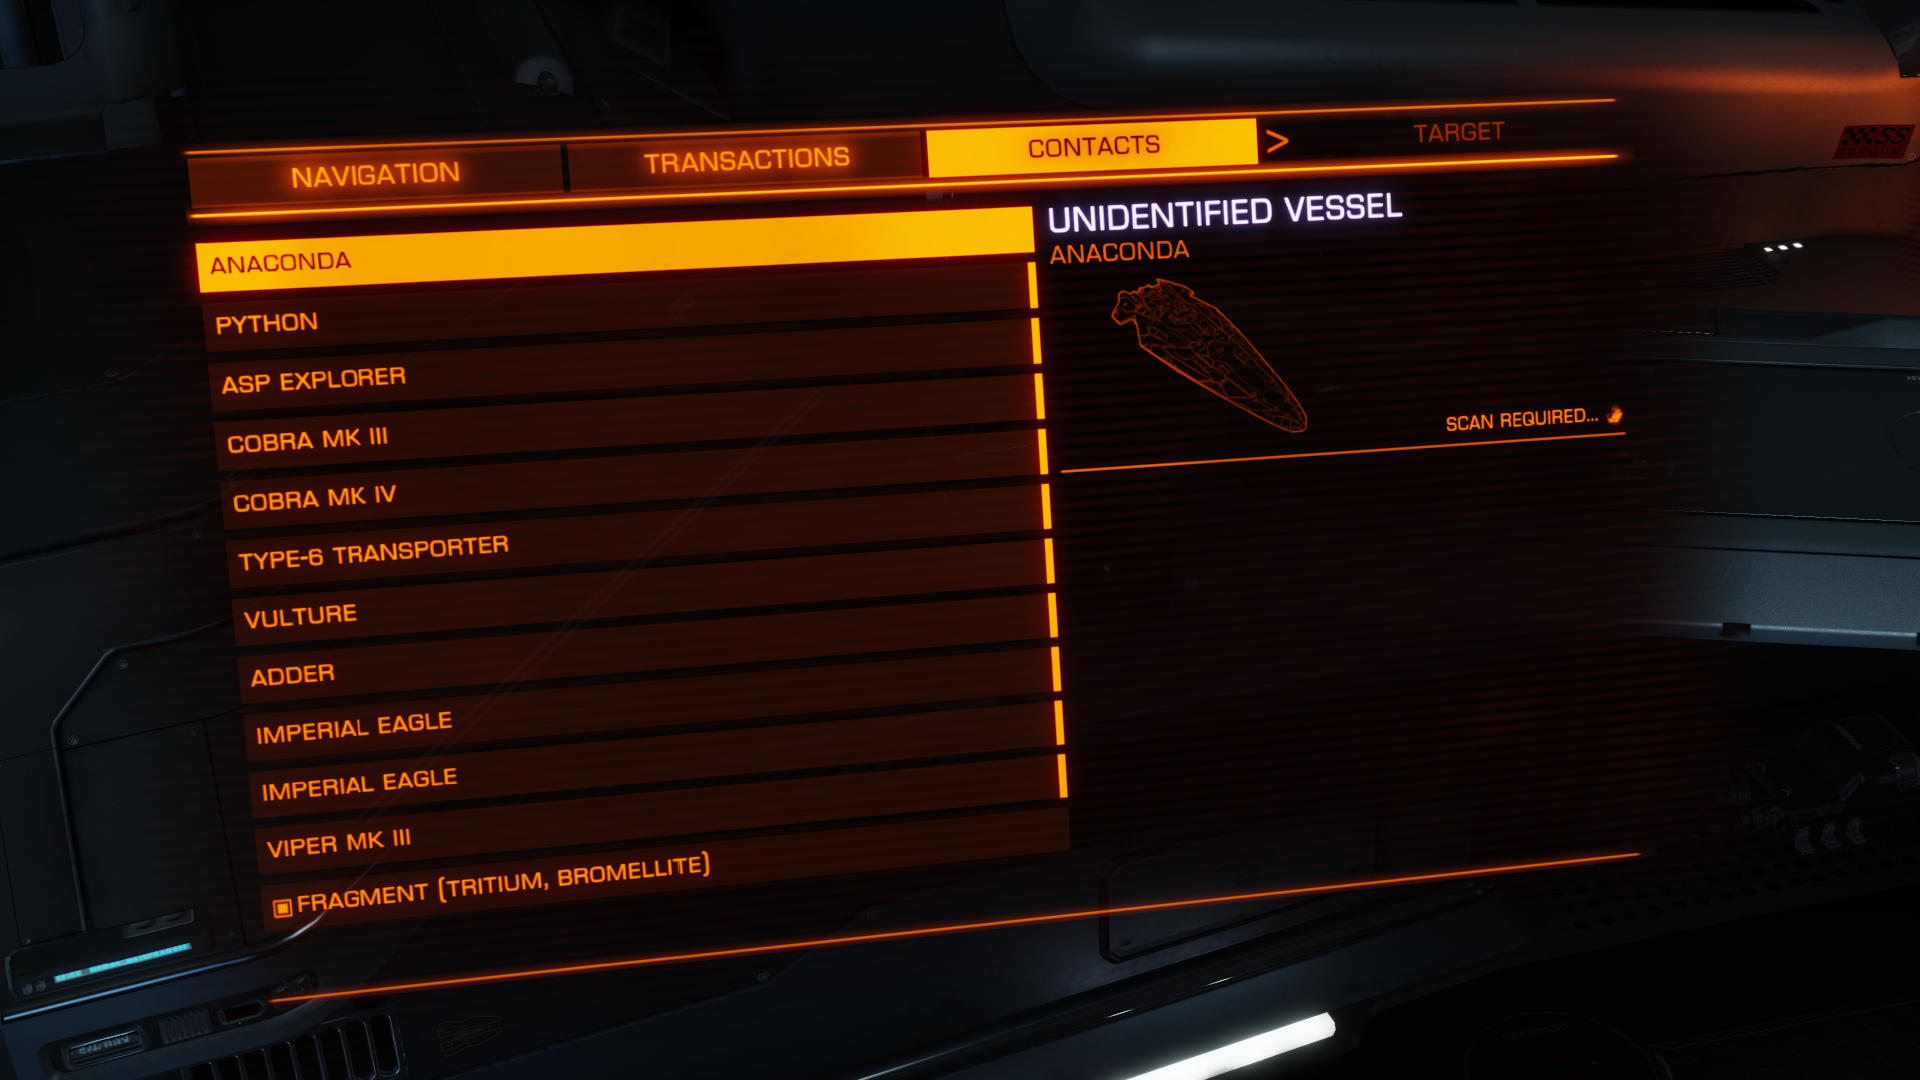
As you might notice, the Contacts list is sorted loosely by starship cost with the most expensive at the top. A happy side-effect of this is that it is also sorted loosely by bounty size with the highest payout at the top, excepting particular models such as the Type-6 Transporter, which are only ever used by honest traders.
There are also a few more exceptions within the scope of wanted criminals, where the accumulated depravity of pirates who are using specialised combat starships can make a Vulture or Fer-de-Lance often be worth more to your Claims ledger than something in a heavier class, but we will return to that comparison later. For now, you are to focus on using your Contacts panel to find the largest Wanted target.
Please note that this is entirely for demonstration; I do not normally dwell on the Contacts panel for that much time, especially not to check the bounty value of an Anaconda before and after using the Kill Warrant Scanner, which averages highly enough that I just engage regardless. Speaking of bounty value, know that the number displayed in the Contacts and Information panels is untrue and only useful for comparison between claims. This is yet another failing of the Pilots' Federation, for all factions pay out many times more than that.
Your efficacy here is linked intimately with the quality of your Sensors, which by now should be A-rated and engineered for long range such that it keeps your Contacts list well-furnished. Rather than awaiting Supercruise drops, if or when you see no more targets in your Contacts panel—or at least, none worth your time—start patrolling the area in the following manner:
- Your first action should be to boost back towards the navigation marker. If your hunt has lead you some kilometers away then your sphere of detection will be off-center; flying into and ultimately past the marker will sweep that sphere across the volume of space most likely to contain a new entry for your Contacts list.
- If you still have nothing, check your radar display for unresolved contacts and get closer to those, if any. An unresolved contact is an intermittent radar reading of a cold or distant object which gives you the approximate direction but not the object type or the actual distance.
- Perform an omnidirectional visual sweep for laser fire in the distance.
- If you end up some distance away from the ring, remember that you can use Supercruise to return quickly to the navigation marker.
Identification
An identification scan, or simply an ID scan, refers not to an active module such as the Kill Warrant Scanner but instead to the built-in ability of your Sensors. There are three consecutive stages to an ID scan; the first gives little more than a pilot ID, while the third gives full module information and a Wanted status.
Be careful that Clean versus Wanted is a derived property, referring to the bounty from factions in this star system being zero or non-zero respectively. A Clean starship for which your Kill Warrant Scanner discovers wider bounties is still Clean in this star system and should not be attacked.
The identification process has a few other properties which, when combined with some behavioural observations of miners and pirates, can give us an efficiency edge when glancing over the Contacts panel. Consider the following:
- Being attacked will provide you the full identification immediately.
- Being scanned will provide you with a pilot ID immediately.
- If known, the pilot ID replaces the starship model name in the Contacts list.
- Power agents never use a personal pilot name (agents of Arissa Lavigny-Duval are named Shield of Justice).
- Miners/traders will never scan you.
- Pirates will often scan you.
- Power agents will often scan you.
Therefore:
- Power agents can be ignored the moment their names are revealed, either due to the agent scanning you or by completing the first ID scan stage yourself.
- If you can avoid scanning a known miner/trader starship model (such as a Type-9 Heavy), your Contacts list entry will retain the model name, making it easier to skip past those.
- If you always complete fully every non-agent scan you begin, a Contacts list entry which has a personal pilot name but no bounty information will always be a pirate.
Have a few more miscellaneous observations of mine, this time for you to interpret as an exercise in deduction. Some are useful directly, others are useful in combination with each other or with the observation set above, and some are inconsequential. In my particular bounty-hunting experience:
- I have never encountered an Imperial Cutter or a Hauler.
- I have only encountered Federal Corvettes while hunting by sanctioned assassination contract.
- I have only encountered Saud Kruger starships at a Compromised Navigation Beacon, and all were Clean.
- Every Imperial power agent has been Clean.
- No Imperial power agent has ever used a Federal or Alliance starship.
- Every Type-10 Defender and Mamba¹ has been Wanted, albeit rarely seen.
- Every non-agent Anaconda, Fer-de-Lance, Imperial Clipper, Krait 2 and Krait Phantom has been Wanted. ²
- Every Alliance starship has been Wanted.
- Every Federal Assault Ship has been Wanted.
- Every Keelback, Type-6 Transporter, Type-7 Transporter and Type-9 Heavy has been Clean. ³
1. No, not my own. I love the Hailstorm, and I would dismantle it explosively before letting it fall into pirate hands.
2. Observe the rings and ask yourself why the smaller non-trade starships are sometimes Clean.
3. Employing another pilot to murder these contacts such that you can then claim the resulting bounty, aside from being hideously inefficient, is a high crime for which you will be hunted throughout Imperial space. Your best hope is that Omega Company finds you before I do.
Subsystems
All items of modular componentry installed within a starship are each exposed to some extent. Thrusters and weapon hardpoints are most at risk, those being directly external to the starship, however the interior modules can also sustain damage from well-placed projectiles which happen to pierce the hull. After acquiring a target starship, try viewing the Target panel to see what subsystems have been detected.
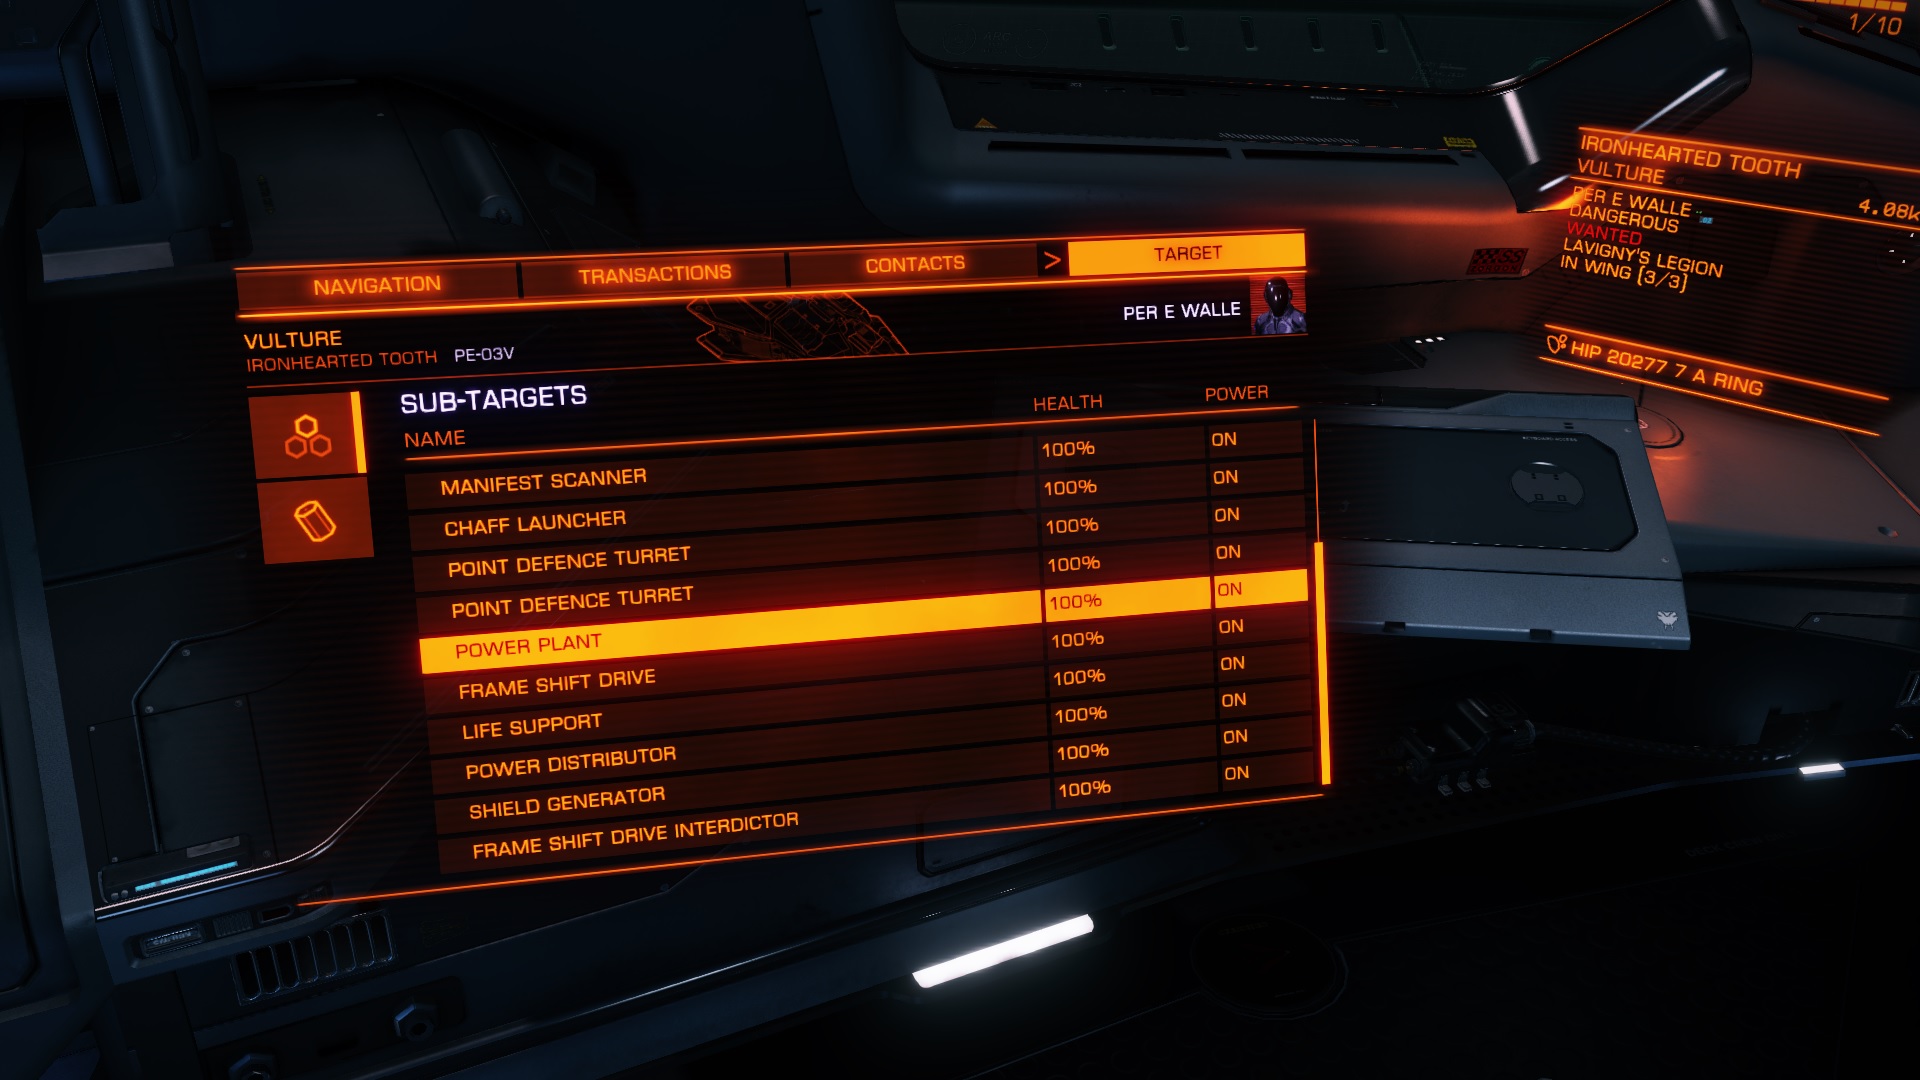
As was foreshadowed in the first chapter, we are interested in the Power Plant subsystem. Unlike with the original contact selection, we are going to be using button controls to cycle through the available subsystems, although I will not forbid use of the Sub-Targets list if somehow you find that to be faster after trying the following method. What follows is a very important efficiency optimisation, so I will try to be extremely clear.
Please assign two buttons, one for each hand, such that both operate the Cycle Previous Subsystem function.
Yes, both buttons are to be assigned to the same starship function. You can get by with one button, but it is your loss unless you are able to push it very quickly.
Yes, that is Cycle Previous Subsystem, not Cycle Next Subsystem. You will be stepping backwards through the list.
Every pilot will have at least one button to spare for this purpose, for we have just freed one a moment ago by disabling Cycle Next Target. With two spare buttons they should be set as directed above, and only if you have a third spare button should you set that to operate the Cycle Next Subsystem function. I use all three in practice, but even then I still recommend training with fewer so that you learn to reduce your cycle overshoot of the Power Plant module.
Speaking of cycling to the Power Plant module, please drill the following procedure into your mind:
- Acquire a target via the Contacts panel.
- Complete the basic ID scan, aborting if the target is not Wanted.
- Use the Cycle Previous Subsystem function exactly six times, alternating hands for swiftness.
- Use additional cycles if needed, depending on what the target display shows.
The Power Plant will always be closer to the end of the list, though will never be one of the final five modules on a shielded pirate starship, hence opening with six cycles. When this is not enough to reach the Power Plant directly, it is also very valuable to observe that the four modules immediately after the Power Plant always follow the same sequence, which gives us an excellent delta indication. When cycling in reverse, you will always see this consecutive pattern at some point:
- Shield Generator
- Power Distributor
- Life Support
- Frame Shift Drive
- Power Plant
It is spectacularly rare for the initial six cycles not to leave you targeting one of those modules. Prior to reaching the sequence above, you will always see a Frame Shift Drive Interdictor on a pirate starship, hence the only way that six cycles could overshoot the Power Plant is if your target is one of the occasional Novice-rank pirate inductees who are made to fly shieldless as some sort of weird welcoming ritual.
Having seen the sequence above, you should now know exactly how many more cycles are needed to reach the Power Plant after your initial six. With practice, eventually you will see the Power Distributor and Life Support flash by your target panel, and you will know subconsciously to ease the cycles and stop on the Power Plant.
If you are using only the Cycle Previous Subsystem function, respond to cycle overshoot by reacquiring the contact target to reset the subsystem list, then try again with your new hindsight. If you used the Contacts panel originally then your selection will persist, making this as quick as returning to the list and pressing the Select button twice; otherwise, the Select Target Ahead function also works for this purpose.
Exsection
I am breaking the usual chronological order of combat by promoting this topic to be the first which concerns action, however I have no interest in slow revelation, and having just presented subsystem selection I find much more value in demonstrating the catastrophic power of Fragment Cannons for exsecting Power Plants. The process of exsection is where the class 3 hardpoints of the Mamba excel truly.
Strip away the shield energy, target the Power Plant, get close with attenuated boosts if needed, then choose your moment to strike with a full volley.
You know your target is finished when you hear the chain reaction, despite the hull still being mostly intact. The Fragment Cannons are adept at dealing the initial damage to the Power Plant, and also at providing multiple hits to increase the chance that one of them detonates the core.
At medium range, a Rail Gun can cripple a module if aimed well, and the Beam Laser and the Multi-Cannon are a good source of repeat strikes.
So beautiful, don't you think?
Destruction
Always keep in mind that this is a dual approach to combat; do not insist on eliminating targets via exsection, and use the damage report from your first volley to help decide how to proceed. If the hull is weak enough or the modules are strong enough then it will be much quicker just to wear down the target normally. We call this simply destruction.
I always love seeing a Fer-de-Lance in range; their hulls are weak enough for a classic destruction brawl, and they pay out far above the effort required.
This idea also applies when the pilot is simply too evasive, which some are. We are built for slaying larger prey, and we are not interested in a boost dance. If your target is seeking to charge at you and boost out of your vision then use reverse and lateral thrust to maintain medium range, observe and respond to any further evasion attempts, and break your target lock to work around chaff.
Unfortunately, evasive targets also correlate with having lower bounties, although you can at least use that relation in reverse to help prioritise your time. Beware light starships, Alliance starships, Federal Assault Ships and Imperial Clippers—if the payout listed in the Contacts panel is less than usual, expect that you will also be working harder for it.
Comparison
As promised, before returning to action I will provide a brief overview of different starships and their relative value to you if Wanted. This is again a little out-of-place chronologically, however it has a valuable contextual advantage now that you are familiar with the dual approach to combat, exsection versus destruction.
Please understand that this overview is merely qualitative and approximate in nature, and applies only to Hazardous Resource Extraction Sites. Bounty claims vary greatly with differences of up to two ranks as listed below, and the comments and recommended approaches are only typical scenarios. Always respond differently if you see reason to do so, and take into account factors such as distance if you have no clear priority target otherwise.
| Starship | Comment | Approach | Value |
| Anaconda | Tough but very slow | Exsection | ★★★★★ |
| Type-10 Defender | Tough but very slow, rare | Exsection | ★★★★ |
| Python | Hull/modules equally strong | Either | ★★★★ |
| Mamba | Weak hull, rare | Destruction | ★★★★ |
| Fer-de-Lance | Weak hull | Destruction | ★★★★★ |
| Krait | Shape favours hull damage | Destruction | ★★★ |
| Federal Dropship | Slow | Exsection | ★★★★ |
| Federal Gunship | Exsection hits the SLF | Exsection | ★★★★ |
| Federal Assault Ship | Evasive | Destruction | ★★★ |
| Alliance starships | Often evasive | Either | ★★★ |
| Imperial Clipper | Weak, often evasive | Either | ★★★★ |
| Asp Explorer | Slow | Either | ★★ |
| Asp Scout | None | Either | ★ |
| Vulture | Weak hull | Destruction | ★★★ |
| Imperial Courier | Tough shield | Destruction | ★ |
| Diamondback | None | Destruction | ★★ |
| Cobra | Pitch down for beam | Destruction | ★ |
| Viper | Evasive | Destruction | ★ |
| Other light starships | None | Destruction | Low |
Stab
Everything is a resource, although some resources are less obvious than others. Ammunition is the clearest, your WEP capacitor is another which is one stage more subtle, and by this point I hope you are fully cognisant of how I consider time as part of the total cost evaluation.
One resource we have yet to spend is our shield energy. If the only functional use of a shield was to protect yourself then there would be no problem with keeping your shield energy nicely full; however, if there is even one way to put your shield energy to use, then that means every moment you have full shield suddenly becomes a waste of your regeneration time.
Approach at a speed proportional to the amount of shield energy you wish to spend, set your distributor for full SYS power, and frustrate your target's attempts to avoid you until you achieve a deliberate collision.
As your confidence and experience improves, by all means spend more shield energy by stabbing with boosts.
Of particular usefulness is that common pirates do not treat this as a hostile action. It can be performed after engaging with gunfire, however its real value is in draining your target's shield energy prior to that with no consequences beyond your own shield energy investment, making your first weapon volley all the more potent. As long as you have shield energy and are willing to spend it, you can do this as much as you like.
This procedure goes by many, many names. At INIV we call it a stab or use the verb stabbing, but the wider Galaxy has a plethora of parlance:
- Tap
- Poke
- Smash
- Slam¹
- Head-butt²
- Hug
- Boop
- Dock at Jameson Memorial
1. I am aware that my starship choice lends itself to being handed the nickname "Slamba" when used extensively for this purpose, which I find both despicable and affectionate simultaneously.
2. An actual head-butt. Kills them dead.
Pounce
As you have just seen with the stab, the attempt to approach will evoke an evasive response. If the target is aiming at you—typically for a scan, but even for gunfire—an approach performed more carefully can often be used to spook the target into pitching away, a method we call pouncing.
Of course, in doing so the pilot has revealed to you the underbelly of their starship, and with it their precious Power Plant. Pouncing is most effective against targets which are attempting a scan.
It can be made to work against an attacker, although this requires some care to pounce not too softly that the pilot can maintain range, yet also not too strongly as to invite a boost. This Python was very lucky to survive the second Fragment Cannon volley, though eventually fell to a pounce:
This will not work at all against highly evasive targets, behaviour more common to pilots of smaller starships but occasionally with an Imperial Clipper or a Federal Assault Ship, which will instead boost away the moment you get too close. Some even seek to close that distance of their own accord, leaving you with few options other than reversing your vector and aiming for a destruction kill, though remain alert at least for any chance at a stab.
In attempting to flank a target, do not end up partaking in a futile boost-dance; neither of you will score decisive hits, and all this will achieve is allowing a broken shield to regenerate. If anything, refrain from boosting to de-escalate the situation so you can at least deal steady damage, then watch your target's movements and decide from there whether you can score the shot you really wanted.
You only get a shot at the Power Plant, or indeed any shot at all, because your opponent gives it to you.
Spend some time piecing together the ideas you have seen thus far. Try practising the following general process for a variety of target starships and combat ranks:
- Select a target from the Contacts panel.
- Boost first and direct yourself afterwards, attenuating if needed.
- Use Cycle Previous Subsystem to target the Power Plant.
- Stab the shield away, either multiple strikes or one fast slam.
- Pounce to reveal the Power Plant.
- Exsect it so quickly that the COVAS barely has time to say "Under attack".
Delightful, is it not?
Wings
Aside from avoiding an assault penalty for attacking a Clean target by accident, another excellent reason to complete the ID scan before engaging is that it will also reveal whether the target is flying as part of a Wing by reporting "In Wing". The numbers you see are this target's position within its Wing, and the total number of starships in the Wing.
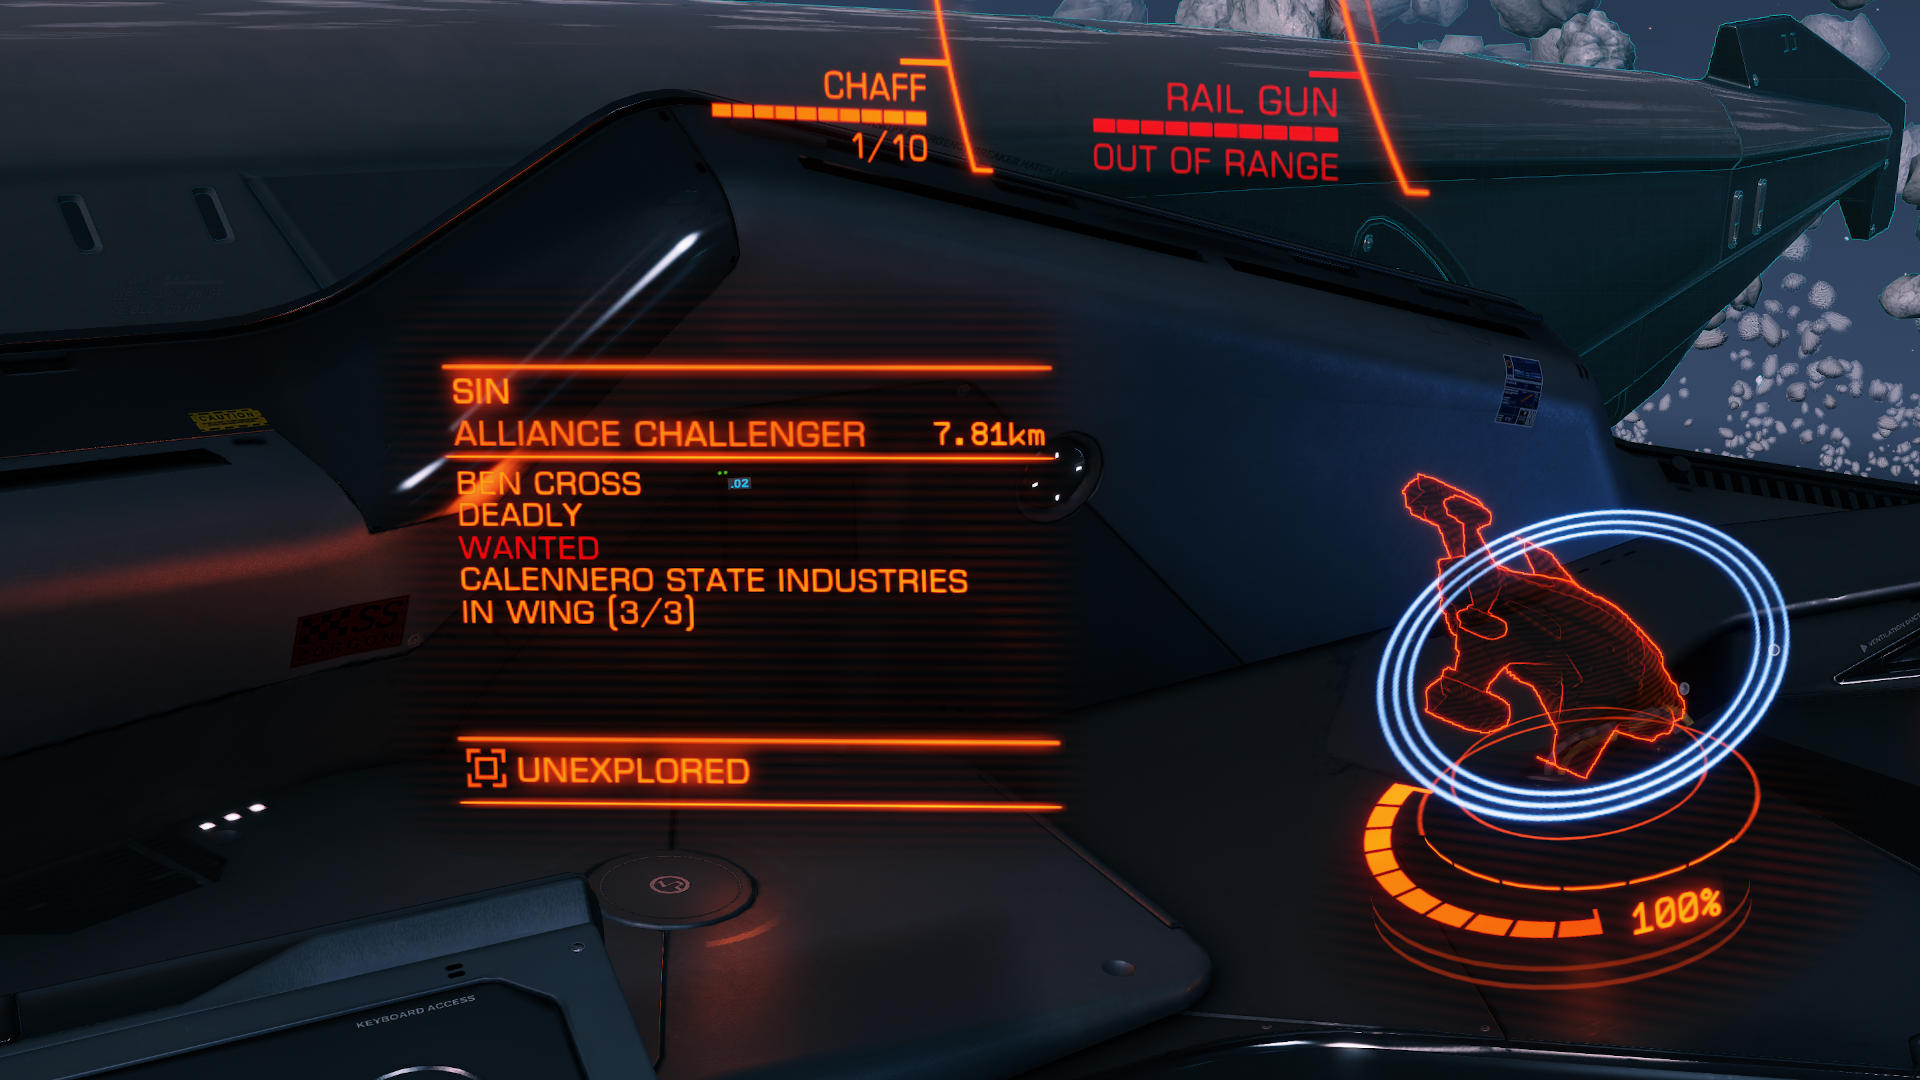
When you attack one of them literally, always remember that you are attacking all of them conceptually. This means that any time spent eliminating the first will be at the expense of sustaining gunfire from the others. Much as with a stab, attacking a Wing implies accepting a shield energy expense which you may need to mitigate via SYS power or recover by using a Shield Cell Bank.
Please evaluate carefully what total ordnance will oppose you before taking them on, including what starship types and combat ranks you see, especially if their crimes are meager and your time would be invested much better elsewhere. Otherwise, go ahead and slay the lot of them.
I use no special approach for eliminating a Wing; for me it is purely a matter of exerting enough firepower to neutralise opposing ordnance before it imposes too great a cost upon my shield energy. Note that if any remaining starship attempts to flee then all others will do likewise, which can often happen after having eliminated the leader and injured another, placing further emphasis upon damage output as a means of avoiding shield energy cost. Chasing them is up to you, but ultimately you are free to target something more valuable as soon as you detect the Frame Shift Drive charging.
At this point, you now have most of my enforcement process available to you, and you could proceed to use it quite successfully. However, there is one more method I want to share.
Grapple
I will temper your expectations a bit by stating this one is not some exotic turnover-trebling ingredient I have saved for last; after all, I did state that I have no interest in slow revelation. It earns its place not through being universally practical, but due to being so much fun.
When your target is larger and slower than you, and every strand of your spirit is pleading for you to empty every last Fragment Cannon pellet directly into the Power Plant, grapple it by steering yourself in with an attenuated boost from above or below, and use your thrusters to remain connected.
To this day, I find nothing else so thrilling as rendering a big, bulky Anaconda so helpless while exsecting its core mercilessly from point-blank range.
Against non-heavy targets this is both less effective and less necessary, but it can help occasionally for ensnaring a would-be runaway and finishing the job.
Unlike evasive prey, the slow and tough ones correlate with having higher bounties. When it takes more firepower than usual to bring down the shield, you know without even checking the Contacts panel that you have a tasty target.
Most exquisite.
Afterword
Looking back, the original idea was really quite simple; take the best weapons and put them on the fastest starship which can mount them. After many dozens of variations, what you see now is the one to which I have always returned.
One of my reasons for illustrating my combat style more fully is that my informal attempts to describe it thus far have been met overwhelmingly with bafflement and disbelief. If this has been at all unclear in any major way then that is on me, however of anyone finding it unproductive I have one simple request:
Go ahead. Criticise it all you like—lack of design, lack of skill, lack of finesse, or anything else to which you think you can point. In fact, please invent as many shortcomings as you can, for I will enjoy smiling in malicious condescension at each of them which omits to demonstrate a lack of bounty claims.
To anyone thinking this material unrepresentative, I state openly that I have curated the above insofar as needing to categorise and display specific concepts, but I promise that it is all otherwise entirely typical. I soar at six hundred from target to target, I dismantle each using some variation or combination of what you have seen, and I have no further interest if you think it is not so.
I have far more time for Commanders who approach this with fascination, enthusiasm, ambition or curiosity and with an open, impartial mind. It is my hope that I have inspired your thought or ignited your passion as much as I may have freed your movement or honed your hunting, and I would be most delighted to see how you use this formula or where you take it with ideas of your own. Even if this style does not take your fancy, it is my hope that you appreciated or enjoyed my presentation of it, or felt a sliver of my fondness for it.
To whom any of that applies I have something even more simple to say:
Thank you.
Well, now you know. Think, feel, fly, fight.

CMDR Aleks Zuno
Imperial Navy Intervention and Rescue
No pirates were spared during the production of these articles.